Multi-Process Pendant
MULTI-PROCESS PENDANTS
There are many ways to multi-process pendants. In one sense, just firing them twice is a multi-process. The purpose for mulit-processing is to achieve additional effects you can not achieve otherwise. This is just one of many examples of how you can make a special pendant through processing it several times. There are dozens of ways to add effects by to your pieces.

I began by cutting some 1 1/2" strips of Bullseye colors as shown.
I then laid some dicrhroic clear scrap on top as shown.
Then I added some clear glass to cover the joints and open spaces. This was just to add some material.
I fired to a full fuse in my Paragon SC2
Rate: 200 deg/min to 1560 deg
Hold 20 min.
I was not concerned about this thin, uneven layer, because I was going to cut the result into smaller pieces. If I made the glass thicker to start, I would have a more difficult time cutting them into pieces.

As you can see, a hole appeared where the glass was too thin and there is fiber paper on the sides.
No Problem.
I'm going to clean the glass and cut it up next. You'll see that even fiber paper powder between glass can give a nice effect.
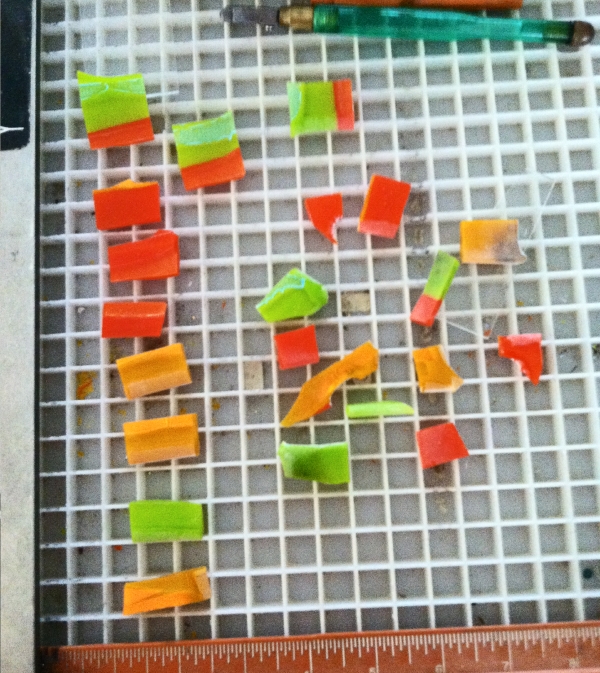
Here is the glass cut into pieces. It doesn't matter what size you cut, but plan a size for your pendant before you cut them.
I cut the larger pieces into 1" widths because I can make several sizes using these pieces.
The colors you initailly select will determine the colors in your pendant. I picked the greens, pumpking and orange because I had a "sunset" motif in mind.
So now I can get started putting together the pieces for another firing.
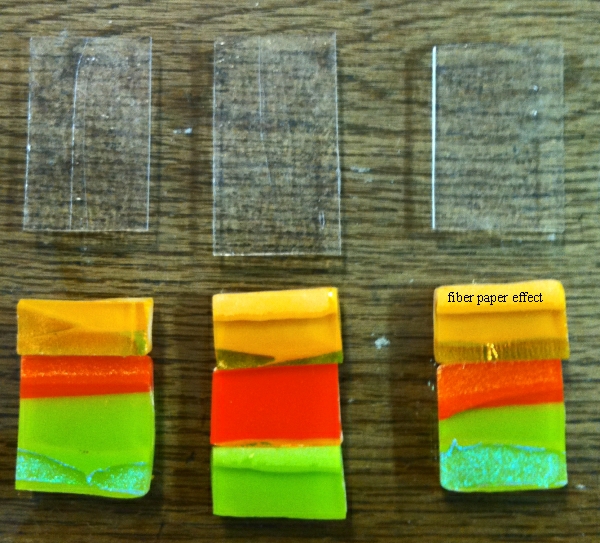
Here are three pieces I picked to make pendants.
Notice that the fiber paper on the top edges gives a nice color to the glass.
I will top it with clear pieces cut to the same size and fire them fully using the same firing schedule.
I'll use the other scrap pieces in other pendant projects.

Here are the pendants after firing.
Now we move on to the next stage.
Since I'm going for a "sunset" effect, I've decided to add some black low fire stencils to the pendants. These fire from 1034F to 1074F. You'll find them under Discontinued Jewelry Products AT A&A Products. I used the following decals. Exotic Animals, Forest Scenes and an Owl.
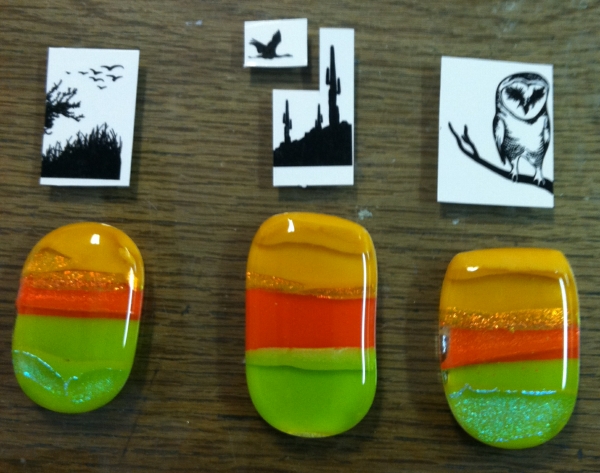
These are the decals I selected.
Notice I used parts of two different decals for the middle one.
By selecting portions of various decals, you can come up with some nice ideas.

Here they are after applying and before firing.
Firing schedule:
Ramp 200 deg/hr to 1040 with NO HOLD
.jpg)
The final step was to apply a spray fixitive. Although this is not required, it brightenes the decal and protects the glass.
The left side is sprayed the fixitive and on the right is not. You can see the difference.
You can find various acrylic sprays at Home Depot and Craft stores.
HERE IS THE FINAL PRODUCT

SOME FINAL THOUGHTS
1. There are many processes you could do to add to beauty of your glass projects.
You could paint with frit, special glass paints or fused glass paints. This will allow you to have good detail in your projects.
You sandblast images on the glass. This works particularly well with dichroic glass.
You could purchase color decals. This is a way to add colorful pictures to your glass.
You could simply keep adding layers of clear and dichroic until you get real depth to your pieces.
2. Remember, when putting clear dichroic glass onto Bullseye glass you won't get the same mix of colors as putting two different Bullseye translucent glasses together. They would blend. That is a transparent red on a transparent blue would move toward some shade of purple.
Not so with dichroic because the coating as actually a layer of color that blocks most of the Bullseye color from coming through. You do tend to get the reflected color (ie copper on cyan copper dichroic) showing through even when the Bullseye glass is translucent. The darker the Bullseye glass, the stronger the reflect color will appear.
Also, putting the clear down or up will give a different appearence. It's good to experiment with some dichroic colors and Bullseye colors to see the various effects.
Pick some standards you like and stick with them. That way you will know what to expect.